Tuesday, May 14, 2013

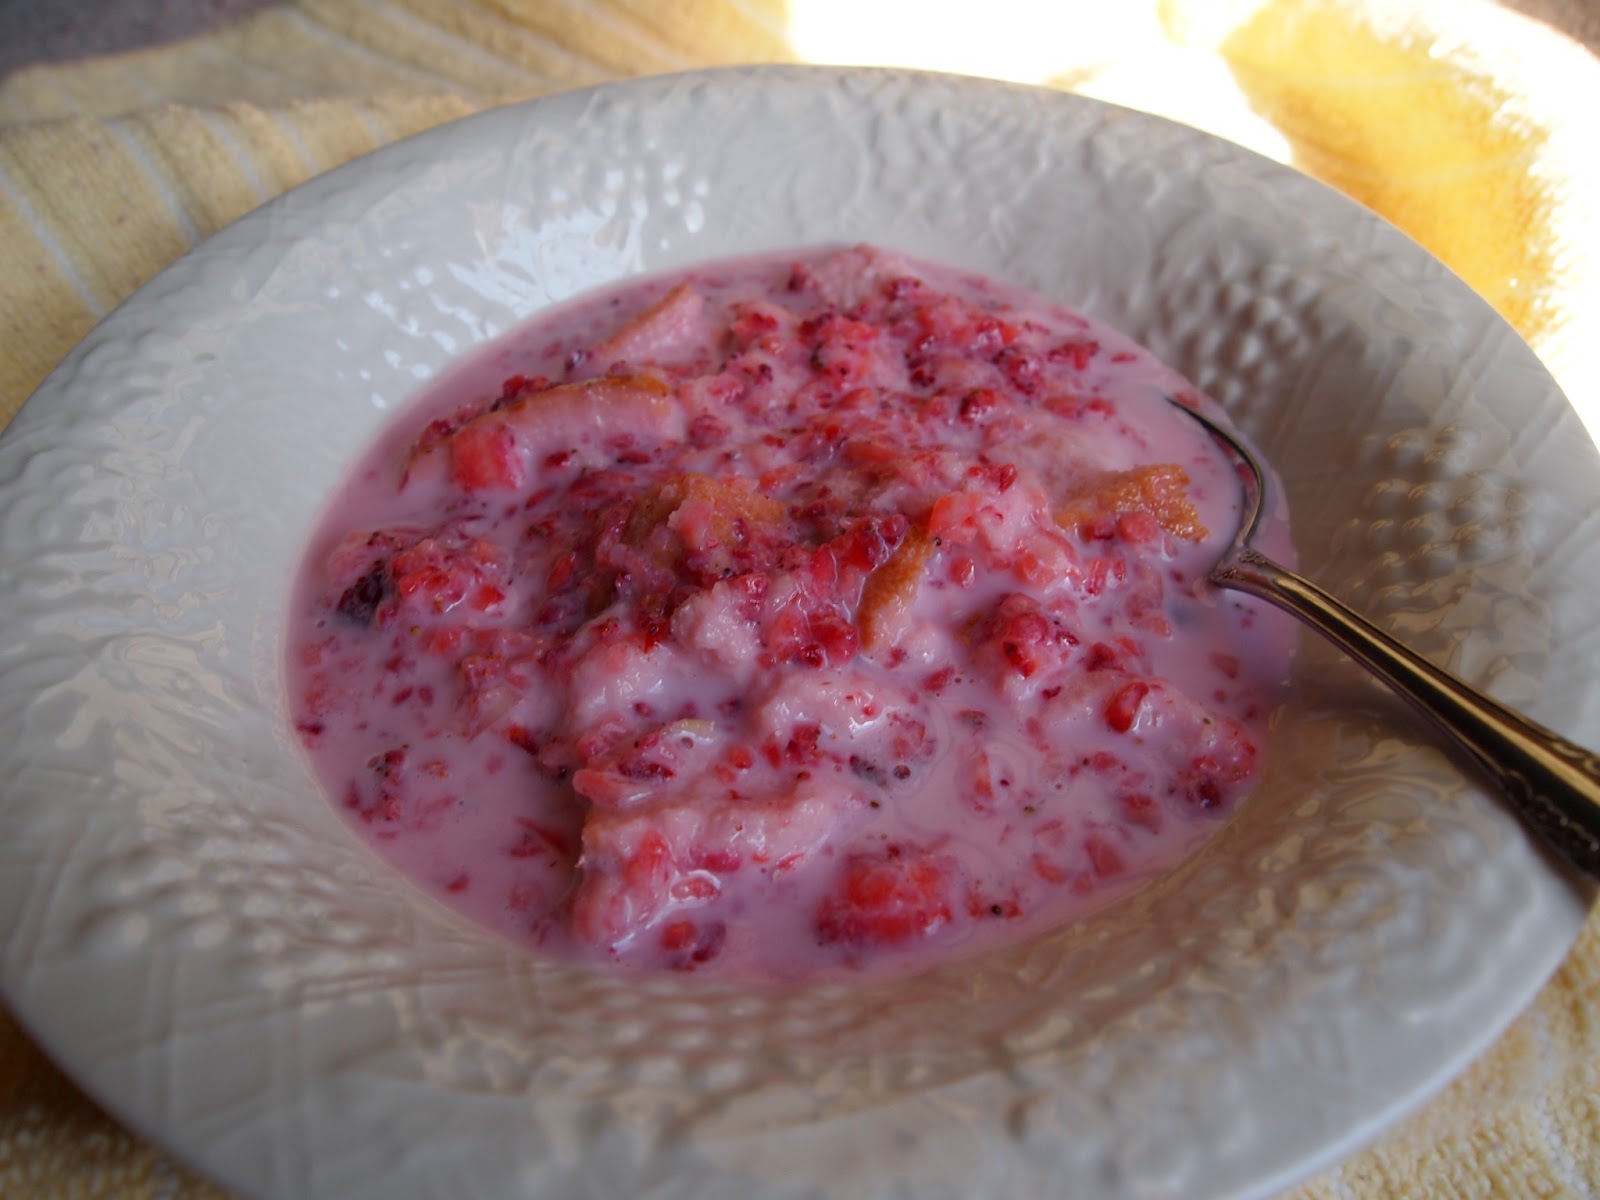
Mennonite Strawberry Soup


The other week when I went to pick strawberries, the ladies I picked with shared that they were going home to make strawberry soup.  I think one was going to have hot dogs with her soup for supper and the other was going to have chicken nuggets made from the chickens we had just butchered.  I was intrigued and had to ask what strawberry soup was.  Not knowing I would become fascinated with the whole idea, I didn't realize I needed to ask for detailed instructions and measurements.  The instructions I was given were to "Slice up your strawberries and stir them with your sugar and milk.  Slice up some bread, but not too much bread, and stir it in.  I like it better without the bread, but the men folk seem to prefer it."  There you go!  That is how you make strawberry soup!  ;)  Yep.  I thought that was all I needed to know too.

Okay, okay.  Let me back up for a moment.  It seems strawberry soup is quite common during strawberry season among my friends who grew up Mennonite or married into the Mennonite community here.  It is simple, quick, and (without a lot of sugar) healthy.  I had never heard of such a thing- and to have it for supper!?  Wow!  I was blown away!

Well, I thought about that soup and thought about that soup all the way home.  I decided it would be a shame not to try it.  I was super excited about it when I walked through the door, so I put all the ingredients out and just stood there looking at them.  I was having that "uhhhh..." moment.  How many strawberries, how much milk, how much sugar, how much/what kind of bread.  I make myself laugh so much.  Who needs a comedian?  Well, I quickly put everything back up and headed to feed the pigs and text a precious friend.  Mmmm, in all honesty, I was kind of desperate to try this soup, so I think I contacted several friends praying at least one would see my dilemma in time and could help me out.  The sweet angel that saw and answered told me to use as many strawberries and milk as I wanted/needed and as much bread and sugar as I needed, but I knew from earlier directions to not use too much bread.  :)  One dear sister that answered said her favorite way to eat this soup in the summer wasn't with hot dogs when she was growing up.  It was with sandwiches with fresh lettuces from the garden.  Sighhhh.....Honestly, where have I been all my life?!  Why did I never know such things existed when I was growing up?  I was eating soda crackers with mustard while my friends were eating like this!  Just kidding.  That wasn't for a meal.  That was just a snack.  :)

Anyway, I went to get more strawberries today.  My children and I LOVE the fresh strawberries from this farm.  They are so, so sweet.  Though I am learning my way around the kitchen without constantly checking a recipe, I do like to have one in case I go for a while without making something and forget a few of the details, so this evening I measured everything I did to share this recipe with you and to have on hand for myself.


First, I cut the tops off two cups of strawberries and pulsed them in my food processor a few times.


To that I added 1/3 cup of sugar and two cups of milk.  Then I pulsed it a few more times.


Next, I transferred this mixture to a bowl and broke up two slices of white loaf bread into the soup.


I gave the bread a few quick swirls in the soup to cover the bread.

Psst...my little girl actually did most of the bread and
stirring.  ;)
The soup was placed in the freezer for about thirty minutes to get it good and cold.  Then viola!


There is beautiful, delicious strawberry soup!  I can now officially say I like it better without the bread, too!  It is also best when eaten really cold.

Strawberry Soup
2 c strawberries with tops removed
2 c milk
1/3 c sugar
2 slices loaf bread

Pulse strawberries 3-4 times in the processor.  Add milk and sugar and pulse 3-4 times to mix everything together.  Transfer soup to a bowl.  Cut or tear bread into cubes and stir into soup.  Put soup in the refrigerator or freezer for about thirty minutes until really cold.  Serve and enjoy!

If you are one of my friends from around here, please feel free to comment with any tips or corrections!  If you are not from here and have never had strawberry soup, try it and let me know what you think!  I want to try it with honey next time to see if it will taste as good.  Oh the possibilities running through my head!  I hope you get to enjoy a spoonful of my new simple, content life!

Until we meet again, may you be blessed!

Friday, May 3, 2013

Making Butter

The other day, my husband unexpectedly came home to have his truck worked on.  The next day he wanted grits for breakfast.  We were supposed to pick up butter from the store on the way home from taking his truck to the shop, but we had both forgotten.  When I woke up the next morning and was just about to dread trying to figure out what to make for breakfast since I didn't have butter, the light bulb above my head began to shine brightly!  I remembered I had heavy cream in the refrigerator, and I remembered a lesson I did with my children where we made butter from heavy cream.  My problem was solved!  I would make my own butter!

First, I poured heavy cream into a clean jar.


The lid was placed on the jar, and the jar was shaken.


When my arm was beginning to tire, my husband's interest had been piqued, and he wanted a turn.  ;)


After shaking for a while, the cream gets really thick and feels as if nothing is happening.


This is why it feels as if nothing is happening, but I knew to keep shaking.  Soon, the most amazing thing happens.  It sounds as if the cream has turned back to a liquid, but it is the buttermilk that has separated from the butter!  It fascinates me every single time!


I ended up with about three tablespoons of butter.  It was just enough to make our grits!


Isn't it neat that we don't always have to depend on the grocery store to provide what we need?

Until we meet again, may you be blessed!

Thursday, May 2, 2013

School on the Go

Hi friends!  I finally have the home school-made-easy idea ready to share!  I was getting worried it was never going to be ready, but it's done!

What do you do for school on days you are sick or life happens and you just have to be away from home?  Does school get put on hold, or do you try to lug tons of books everywhere?  This is one I always struggled with.  I have used both options, but I haven't been happy with either.  In comes the School on the Go binder.

A special thanks to my sister who helped me
with the school label!  She took my idea,
re-drew it, and made it cute!
This little binder is what I plan to use for days when life comes calling.  Isn't that part of the beauty of homeschooling?  I simply love not having to be tied down to my house just to do school work.  I don't know what your views of school are, but for me there is more to school than just books and worksheets.  We love to live learning, and there is a lot to be learned and experienced out there in that big world!  Who wants to be stuck at home all the time?


The binder is divided into sections by these pocket dividers.  There is a pocket for each subject.


I have stacks of worksheets covering different subject areas leftover from my teaching days.  It is very easy to pick a sheet for any subject and place it into the correct pocket.  If you don't have worksheets readily available, there are many places online to find any that suite your needs.  Pinterest is always a great place to start.

I am not always in love with the idea of worksheets even if they are the easiest thing to pull out when mom is out of commission or out on the road.  For that reason, I have also added index cards to each section with a choice of activities from which the student may pick.  I love the cards because they can easily be changed or added to.


This picture is just to show how the cards are easily added to the binder by punching two holes in the cards.


In addition to the activity cards, I also recommend keeping a notebook, index cards, a pencil pouch and a book in the front of the binder.  It is a great idea to keep a pencil (or two), crayons, scissors, and a small bottle of glue in the pouch.


It's not fancy, but it works.  That what my ideas here are for.  They're intentionally easy enough for anyone at home to create without any special equipment.  What do you think?  What ideas do you use to make your school days easier?  The teacher in me always loves hearing other's ideas!

Until we meet again, may you be blessed!

Monday, April 29, 2013

Jam Session

Last summer I bought some strawberries at the store.  For some reason we didn't eat them, but I didn't want them to be wasted.  My interest in canning had just begun, so I got brave enough to try my hand at jam.  I could not believe how easy it was to make my whole two jars of jam.  lol!  Well, even if it was only two jars,  I was hooked.  The canning bug was in my system, and I knew there would be more to come.

When we picked strawberries Saturday I knew I would be making lots of jam.  I was going to see to it!  Have you ever had homemade strawberry jam?  Seriously, is there anything that tastes any better?????  Well, I took some berries to my sister and asked if she and my mother would come down for a jam session. :)  My mom wasn't really into the whole jam making thing, but she did prepare some of the berries.

First, my sister crushed berries and added the right amount of pectin as I got the sugar and jars ready.


Don't faint!  It took 20 cups of sugar!  Yikes! (Update:  I will NEVER use that much sugar again!)  Next, the crushed strawberries with the added pectin were placed on the stove and cooked to a boil.  The jars were in another large pot to boil for sterilization.  The lids were in a third small pot of warm water.


Once the berries and pectin come to a boil, the sugar is added all at one time, unless you are me, that is.  Normal people make sure the pot being used is big enough to hold all the berries and sugar, but how boring is that!?  I like to try to add too much sugar into too little of a pot, spill sugar all over a hot stove, make a mad scramble for a chair to reach an upper cabinet to get a large pot, and pour the contents of the small pot into the big pot, add the remaining sugar, and smell burnt sugar while trying to quickly wipe up the stove!  My sister had slight panic in her voice in the middle of all that while telling me that she couldn't stir with the spoon she had.  She was on her own with that one, poor thing.  I think I heard her ask where another spoon was, but I don't know if I actually uttered words to answer her.  I do know she ended up with the wooden spoon, so it worked out.  :)  Sorry Sis!  Hopefully, you aren't like me, and you do things in a sane manner.  If not, however, once your berries and sugar are happily cooking in a nice, big, comfy pot, you can breathe and calm down for a while as you stir the mixture constantly.  Make sure your jars are ready or nearly ready at this point.  My sister and I kept stirring the berries until they came to a boil that didn't stop when stirred.  At that point, the berries were boiled one minute, and removed from heat.  The sterilized jars were removed from water and filled the with the jam.  The jars were then given a lid and ring.  My sister was a wonderful help taking jars from the water, helping get the lids on the jars, and moving filled jars so I could fill the other jars more easily.  Once all the jars were filled and lidded, they were placed into a water bath for ten minutes.  Not everyone agrees with this step.  Some do it and some don't.  My thought was that it doesn't hurt, so why not?  :)  While you wait on the jars in the bath, I dare you to try not to stick your finger in the jam pot to sample the jam you cooked!  When the ten minutes were over, the jars were removed from the pot to cool and listen to the tops pop as they sealed.  I LOVE that sound!


Ideally, the foam would be skimmed from the top of the cooked berries before being poured into jars, but well, um, my methods aren't always ideal are they?  heehee!  ;)  Considering our faulty methods, I am still happy with how pretty the jam turned out!  I am telling you, if we can make pretty, delicious jam with all the mistakes we made, anyone can do it!  It is not a hard process at all!  I can't wait to see what else I find myself canning this canning season!

So, tell me.  What is your favorite thing to can?  Don't can?  Do you have a favorite home-canned item you like to eat?  I hope to hear from you!

Until we meet again, may you be blessed!

Saturday, April 27, 2013

Chickens and Strawberries

Good evening friends!  I know I told you I would post about a home school on the go idea, but I regret to inform you that I can't do that post until next week.  Part of my project is still an hour away from my home.  I promise I will share it next week.

Perhaps, though, you would be interested in the unexpected fun I had today.  Yesterday I found an invitation to a chicken butchering in the messages on my phone.  I changed around my original plans for the day so that I could go.  Do you remember the post about the hog butchering?  The chicken butchering was at the same place.  My friends Esther and Mari simply amaze me.  I think they have forgotten more wonderful things than I will ever learn!  The chickens we were butchering belonged to Esther and her husband.

I arrived a little too late to see everything from start to finish.  When I arrived, the chickens had already been beheaded, and they had been placed in hot water and removed.


I arrived just in time for plucking!  I didn't know what I was in for, but I was tossed a chicken and told to just start pulling out feathers.  My first thought was, "Dear heavens!  This is going to take forever!"  To my surprise, it wasn't so bad.  Of course, the others could probably pluck two or three to my one, but still!  I think they cut me some slack since it was my first time.  :)  Who knew plucking feathers could be fun?!


Here I am with "my" chicken!  I didn't mean to leave the cute little cuffs around the ankles, but I am really liking them!  heehee!

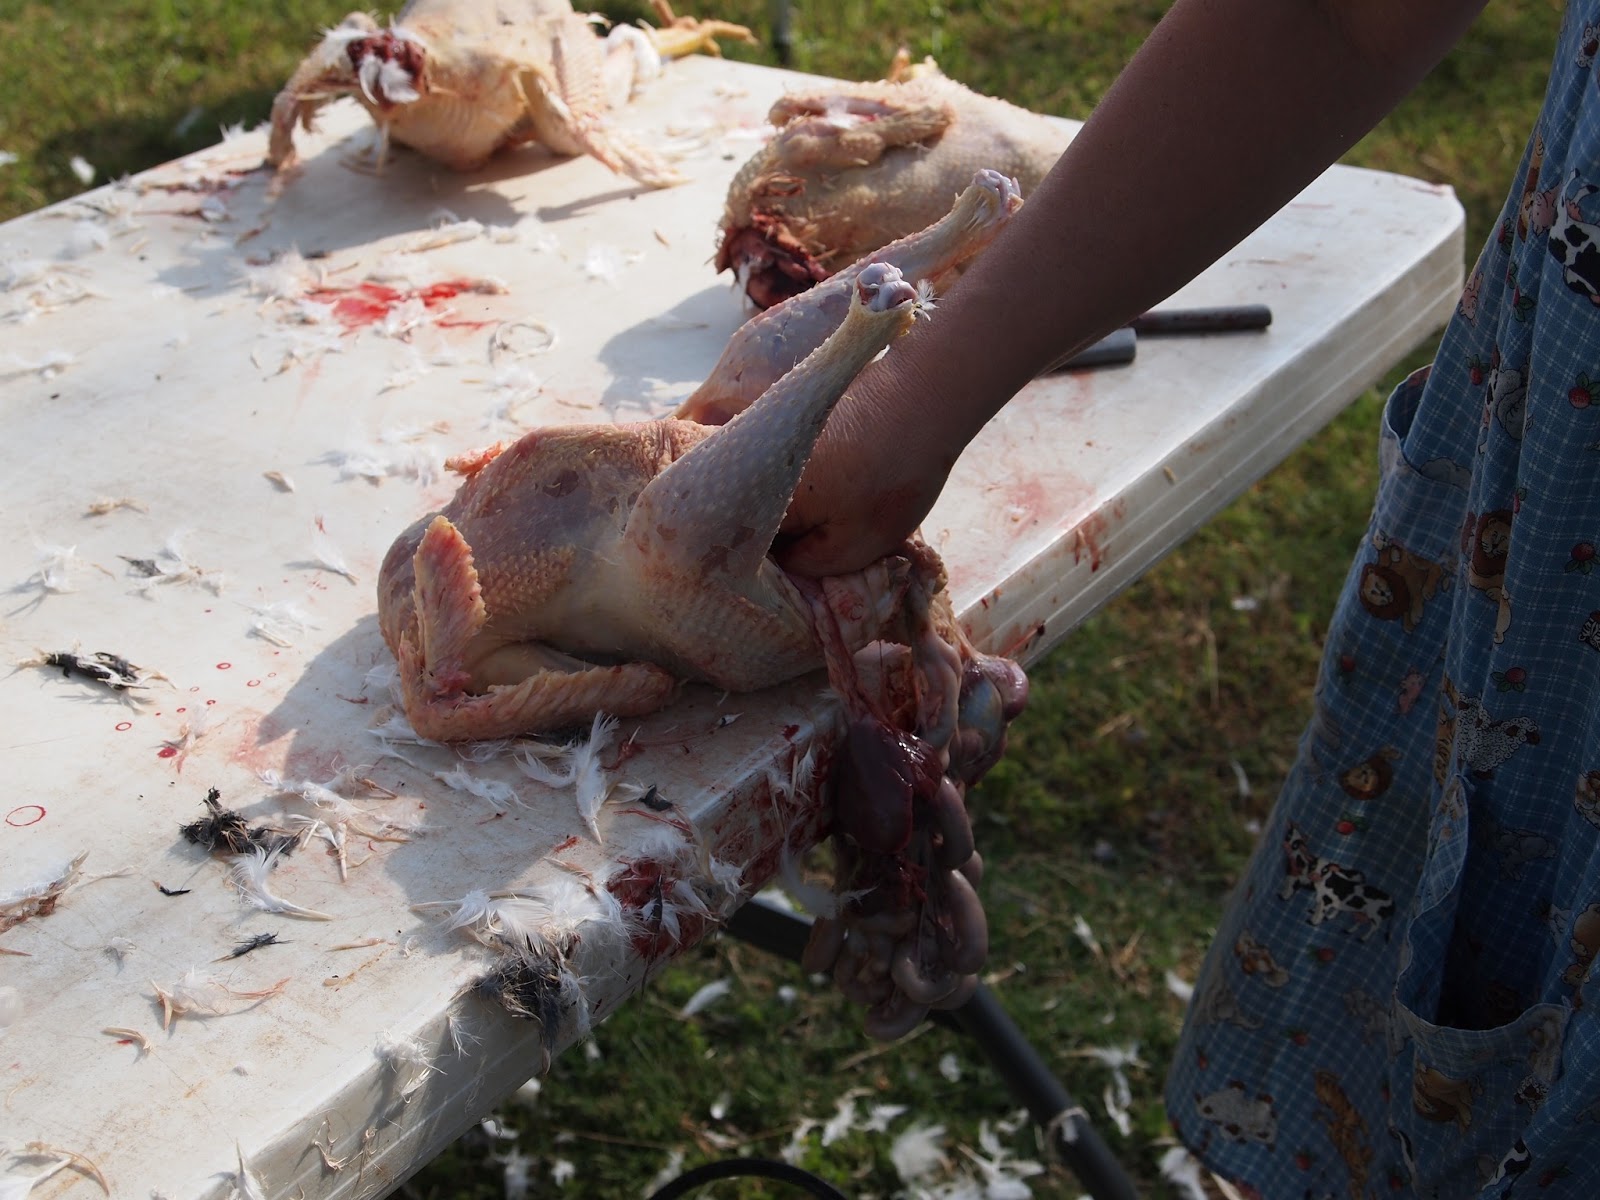
Next the poor chicken lost it's cute little cuffs along with it's feet and innards (That's redneck for anything inside the chicken or other creature one may be describing!  heehee!).


A good rinse, and into the ice bath it went!


Finally the old bird was cut up and put into bags to be frozen!  Easy peasy!


Look at the view I had while I plucked!  Who would mind plucking a chicken when looking out at this?


Beautiful I tell ya!  Every time I go to this beautiful part of the world, I wish I could move our home and land there!

Well, as we worked, we all realized we had the same plans of going to pick strawberries just down the road after we were done.  That is exactly what we did.  It was comforting to know we wouldn't be the only person there covered in chicken feathers and innards!  ;)

Picking strawberries was a first for my children and me.  It was a perfect day for it, and we had a lot of fun!  And the berries?  Have mercy were they delicious! I have never had such sweet strawberries.  Don't even get me started on the fresh strawberry lemonade!  :)


Alissa simply adores Esther and her babies!  I think getting to play with and watch after the precious twin girls was her favorite part of the day!

My friends, I tell you!  I have a very blessed life!  I am so honored God picked me to live it!

Until we meet again, may you be blessed!

Friday, April 26, 2013

The Sad Un-Garden

Yesterday, I shared with you a little ironing board I created from a t.v. table.  When that project was complete, I came in to work on a pen-pal basket for my daughter.  So many times my daughter writes letters to her precious little pen-pal and it takes me forever to get them in the mail simply because I keep forgetting to put an address on the envelope and put it in the mail.  It finally occurred to me to make a basket of supplies for her to prepare her own letters to go in the mail.  I am currently without a computer that works with my printer, so I just printed some labels by hand and added them to a small basket with a few envelopes and stamps.  Now, addressing and stamping an envelope is as easy as putting on two stickers!  Hopefully, now, her sweet pen-pal won't have to wait so long between letters- at least on my part!


After finishing that project, our family headed out of town to run a few errands.  Upon visiting a garden center, I simply could not resist the urge to buy tomato plants and a basil plant.  The thought of going through the summer here in the south without my own tomatoes was killing me!  What true southerner does that???  I didn't have a clue what I would do with them when I got home, but I just had to have them!  I looked at a few pots, but I couldn't justify spending $20 a pot for tomato plants I didn't have to have.  I decided I was just going to have to make a garden.  Do you ever feel sad over the appearance of your garden?  Well, I can just about guarantee your garden looks better than mine.  I know because mine isn't really a garden at all.  Since last summer I have begged for raised beds.  I have begged for tilled ground.  I have begged for the tiller to be cranked so I could try till up the ground myself and prepare it for planting...something, anything...just something somewhere where I could plant something!  Sigh....Planting season has found me with no place to plant my new tomato and basil plants or the little seedlings I have babied for weeks.  Now, you have to understand I don't have a green thumb whatsoever!  I have the worst brown thumb you have ever seen.  I am doing good to keep the hair growing on my head!  For me to have taken seeds from a vegetable I ate and to have grown actual plants was nothing short of a miracle!  I simply could not let my plants, bought or grown myself, sit and die.  With my son's tiny little trowel in my hand, I picked a spot in my backyard and started digging a hole.  There!  There is where my garden found itself.  No tilling and turning of soil, no soil amendments.  Nothing but a hole dug in the weeds.  Then another hole and another hole, and another hole until I had ten tomato plants, two garlic plants, a basil plant, and twenty one pepper plants in their new home in the weedy plot of ground I deemed a garden.  I planted the vegetables after I planted the ten snapdragons I started from seeds in an appropriate place in the flower beds.  My husband did feel sorry for me when I got down to the last few pepper plants and stabbed myself with the trowel.  He pulled out the mattock and dug the last few holes so I could more quickly get the rest of the plants in the ground.  That was a good thing since it was getting dark and he was grilling a delicious steak!  This is what I ended up with.  *Warning!  The following images may be disturbing to some viewers.  Viewer discretion is advised!*


What's that you said?  You can't see the plants?  Don't feel bad.  You are not alone.  It takes me a few minutes to find them too!  :)  Look a little closer.


There is the basil, and if you look carefully, you may be able to see a couple of tomato plants.


It's sad.  I know.  Painful actually.  I warned you, though!  Here.  Take a peek at a few of the peppers, and the torture will be over.


Anybody want to come get rid of weeds?  :)

Please share your garden success with me!  I would love to see them or at least hear about them!  Even if mine can't be beautiful, I can appreciate those that are!  It gives me hope for next year!

Until we meet again, may you be blessed!

Thursday, April 25, 2013

Craft Room Ironing Board DIY

Hey y'all!  I told you yesterday that I was super busy marking items off my to-do list.  Creating this nifty little ironing board was one of the projects I completed.


The idea all started with this picture on Pinterest.  I was so excited because I do not have an ironing board.  I just don't like that big, bulky thing taking up valuable space.  :)  I clicked on the photo to find a list of materials I needed, and guess what...No list!  No description!  No instructions!  It was just a photo someone had found on Fliker!  I was disappointed and the perfectionist in me nearly started having spasms, but I decided I would just wing it on my own and hope for the best.


These were the materials I used.  I had one t.v. table, a piece of fabric that was tucked away in my craft supplies, a heavy duty stapler, a pair of scissors, and a roll of high loft polyester batting.  Oh, and one very cute dog was supervising!


First, I laid out my fabric with the right side down and then placed the batting over it.  I let the fabric leave a very small border.  It just seemed like a good idea, but probably not a necessity.  ;)  heehee!


I then turned the table upside down on the layers of fabric leaving about a two inch boarder of fabric on two sides and


just trimmed, freehand, around the other two sides also leaving about a two inch border.


Lastly, I stapled around the edges, doing opposite sides at a time, and then trimmed the excess fabric.  Viola!


Now I just need to find another project that will give me a reason to use the new ironing board!  :)  I guess I could go find something in a closet somewhere that needs to be ironed, but what fun is that?

Tomorrow, I'll be sharing my sad, little garden and a pen pals made easy idea that I also marked off my list yesterday.  On Saturday look for a home school on the go idea that I worked on all in the same day as these other projects!  Has the arrival of spring left you with a DIY itch?  I would love to hear what you have been working on!

Until we meet again, may you be blessed!