Good day, reader friends! Can you believe the holiday season is already upon us?? We have been so busy here this year that this holiday season has crept up on me! I still can't believe Thanksgiving is this week! Wow!
The other day I hunkered down and faced the reality of the approaching festivities, pulling out my Thanksgiving planning cheat sheet to begin my grocery list. I thought I would quickly share it with you in case you would like to make one to use this year and years to come.
I folded a sheet of printer paper in half long ways. On the left, I wrote my schedule of things that need to be done and the order in which they need to be done. On the right, I wrote my main recipes. This helps me check my ingredients and herbs at a quick glance as I make my shopping list before Thanksgiving. Not having to search and flip through recipes makes the process so quick and easy. On the big day, having my schedule and recipes for the day in the same spot and on one sheet of paper creates a little more calm and sanity for me. I say, " What's not to love about that?" I've loved it quite a bit the last few years! I hope it inspires you to create one of your own to fit your own needs!
I hope you have a wonderful Thanksgiving, reader friends!
Until we meet again, may you be blessed!
Sunday, November 24, 2019
Monday, November 18, 2019
Fall Fun
Good day reader friends!! I pray this post finds you well! How has fall been where you are? It seems like fall here, like many other places, is having a bit of an identity crisis.
One day, though, the day was perfectly fall-like! It just so happens we had something really fun planned for the day.
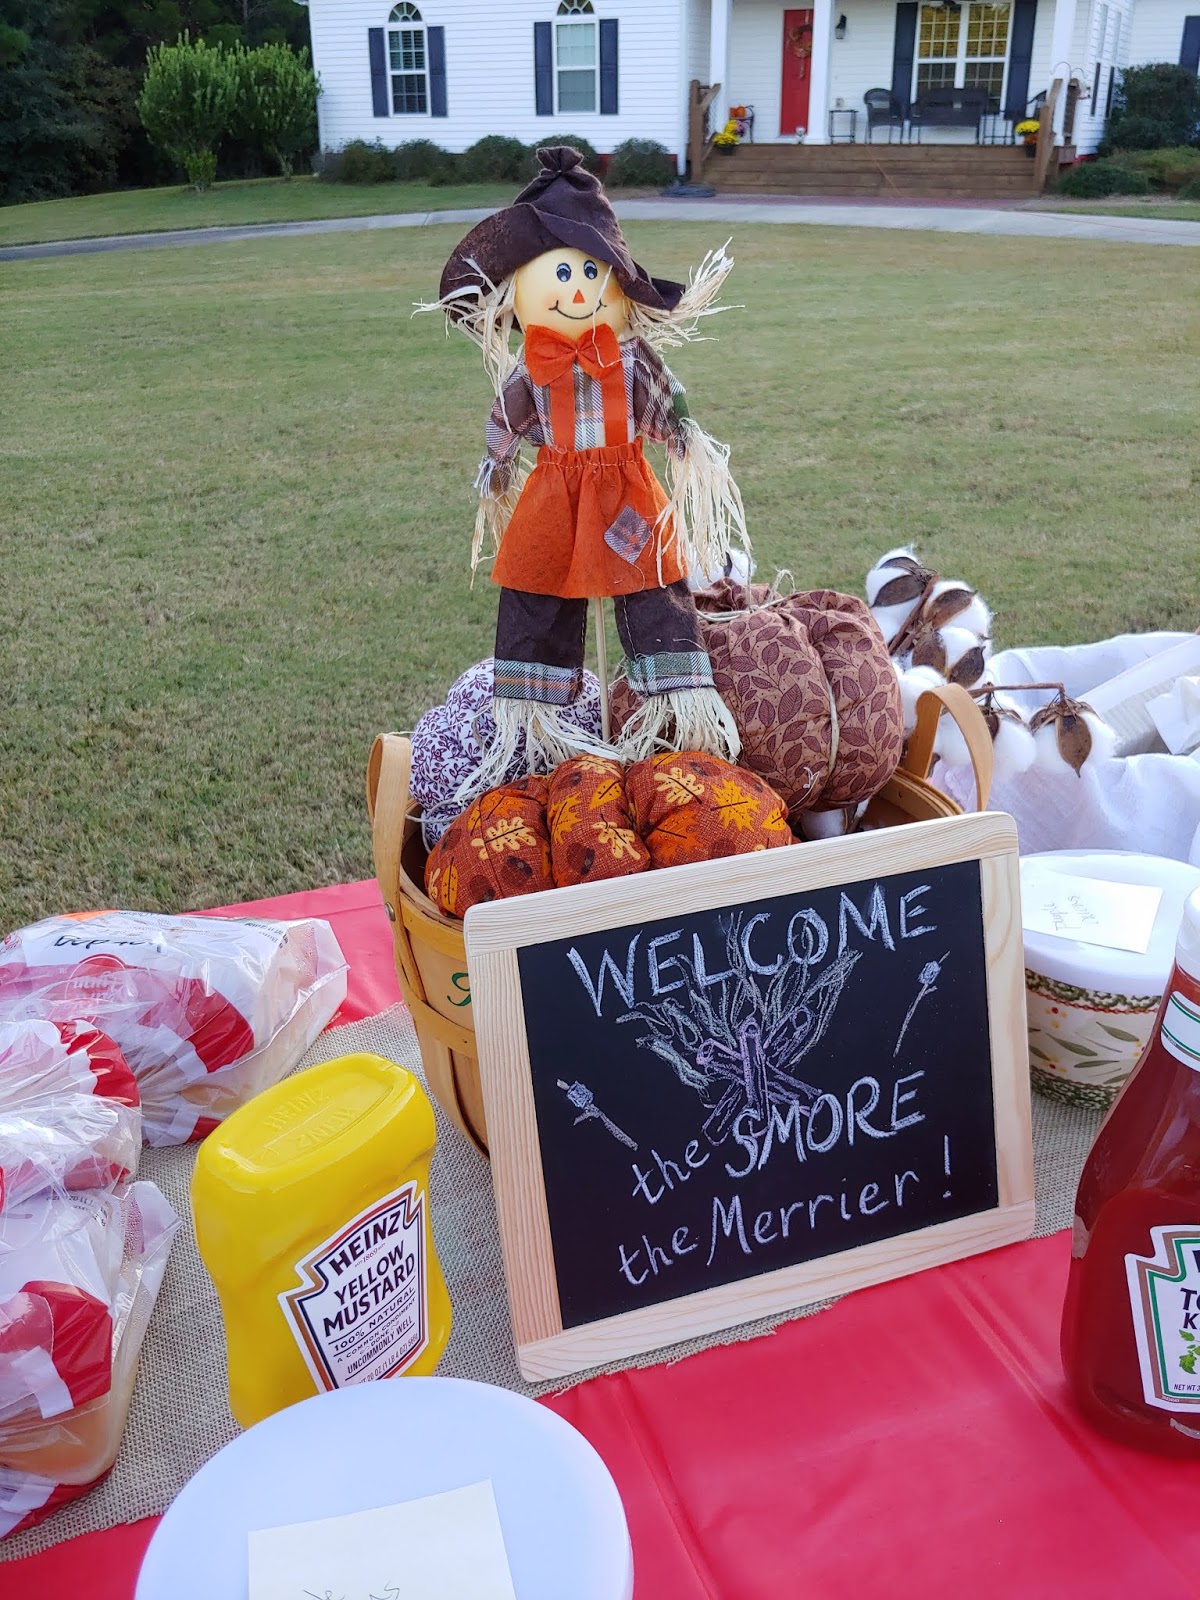
Have you ever wanted to really do a particular fun activity, but that activity was not being offered anywhere near you? Such was the case with me earlier this year. I wanted to enjoy a big bonfire with friends. I wanted the young and old all together enjoying the company of one another, laughing and having fun while roasting marshmallows and making s'mores. Since there was no such thing being offered, I decided to plan and do it at my home. We don't have to wait for others to offer an event, we can plan and host it ourselves! I was so excited to do this for our church family.
I also created a photo scavenger hunt for people to participate in during the afternoon leading up to the bonfire. I still am hearing stories and laughter about that event from those who participated. I even here the words "next year" in those conversations. That is so exciting to me that so many people enjoyed it so much and want to do it again! I believe God gives us ideas and creativity to bless others. I am so thankful He used my husband, my children, and me to bless our church family!
Here are a few clips from our day and night. The first three photos are just a few of the MANY photos from the scavenger hunts. These just happen to be the only ones I could use due privacy issues. The remainder of the photos are from the bonfire.
The next picture is from the hotdog and chili table. The hotdog weiners were placed in a casserole dish for everyone to roast his/her own. I added a big pot of homade chili to complete the meal.
I hope you find something here that inspires you to bless others or that sparks that little "I can do that" inside of you! Don't let life pass you by! God has given you the gift of today. He has given you life! Don't be afraid to step out of your comfort zone and make something happen that will create beautiful, fun memories all around you! You can give others that gift and receive your own amazing blessings at the same time! You don't have to be fancy or Pinterest perfect to have fun and create fun! Just get out there and do it! Much love to you all!
Until we meet again, may you be blessed!
One day, though, the day was perfectly fall-like! It just so happens we had something really fun planned for the day.
Have you ever wanted to really do a particular fun activity, but that activity was not being offered anywhere near you? Such was the case with me earlier this year. I wanted to enjoy a big bonfire with friends. I wanted the young and old all together enjoying the company of one another, laughing and having fun while roasting marshmallows and making s'mores. Since there was no such thing being offered, I decided to plan and do it at my home. We don't have to wait for others to offer an event, we can plan and host it ourselves! I was so excited to do this for our church family.
I also created a photo scavenger hunt for people to participate in during the afternoon leading up to the bonfire. I still am hearing stories and laughter about that event from those who participated. I even here the words "next year" in those conversations. That is so exciting to me that so many people enjoyed it so much and want to do it again! I believe God gives us ideas and creativity to bless others. I am so thankful He used my husband, my children, and me to bless our church family!
Here are a few clips from our day and night. The first three photos are just a few of the MANY photos from the scavenger hunts. These just happen to be the only ones I could use due privacy issues. The remainder of the photos are from the bonfire.
![]() |
| S'mores Kits |
| I tried to have enough variety to try to Make everyone feel loved, blessed, and Thought of. |
The next picture is from the hotdog and chili table. The hotdog weiners were placed in a casserole dish for everyone to roast his/her own. I added a big pot of homade chili to complete the meal.
![]() |
![]() |
| We wrapped utensils to make Everything easier to hold. |
![]() |
| The crowd arrived just before dark. |
I hope you find something here that inspires you to bless others or that sparks that little "I can do that" inside of you! Don't let life pass you by! God has given you the gift of today. He has given you life! Don't be afraid to step out of your comfort zone and make something happen that will create beautiful, fun memories all around you! You can give others that gift and receive your own amazing blessings at the same time! You don't have to be fancy or Pinterest perfect to have fun and create fun! Just get out there and do it! Much love to you all!
Until we meet again, may you be blessed!
Tuesday, October 15, 2019
Autumn Blessings Jam
It is not uncommon to walk in my home and see newly canned jars of food sitting on my side table or china cabinet shelf. Yesterday, I had just finished canning this recipe. The kitchen was cleaned up, and I was starving. As I bustled around the kitchen, scrounging up a late lunch, I looked up and the view caught my eye. The warm smile worked its way from my eyes to my toes. Sometimes, it is the beauty in the simple and mundane that bring the warmest satisfaction and contentment, and that is exactly what I felt seeing my little jars nestled away and cooling. It may sound silly, but it's true. I love the satisfaction of a warm, clean kitchen with food cooling in jars on my shelves. It is given to its own form of beauty that I enjoy. This little life of mine is a beautiful gift from God.
Whether beautiful jars cooling in a freshly cleaned environment is what you enjoy or not, you can still enjoy this jam. It, too, evokes the feelings thinking of fall typically produces. It has a warm depth from the cinnamon and pie spices with the sweetness combining with the brightness of the dried berries to all be melded together with the pomegranate juice. To taste it makes me feel like I should be at a fall festival with hayrides and apple bobbing on a cool, crisp evening while sipping apple cider around a fire...you know the Hallmark version of fall, not the the scorching, oppressive fall we have been enduring here in the south. ;)
So, tell me. In what do you find beauty, satisfaction, and contentment? Then try the recipe and tell me what you think!
Autumn Blessings Jam
3 c pears, cored, chopped and crushed
2/3 c dried cranberries, coarsely chopped
1/4 c pomegranate juice
1/4 c bottled lemon juice
1 t cinnamon, can reduce
1/8 t ginger
1/8 t nutmeg
1/8 t allspice
2 T powdered pectin
4-1/2 c sugar
1/2 brown sugar
Prepare the canner, jars, and lids by putting the jars in the canner on the stove with water to keep them hot until the jam is done. I also like to lay out everything I will need to fill and prepare the jars once the jam is done since everything runs at a quick pace after the cooking begins.
Gather all the ingredients for the recipe to begin prepping and measuring them out.
Measure out the spices, sugar, juices, and pectin. Don't forget you can reduce the cinnamon if you don't enjoy a strong cinnamon flavor.
Next, measure out and chop the cranberries.
Peel, core, chop, and measure out the pears. I like to do a cup at a time and store them in lemon lime soda or lemon water until I am done with all the pears.
Next, drain the pears well, and crush them. I used a potato masher. Try not to leave any large chunks.
Now the ingredients are prepped and cooking can begin.
Bring this mixture to a rolling boil, stirring continuously. Then add add the sugar in all at once. Continue to stir continuously. Bring the mixure back up to a rolling boil. Boil exactly one minute.
When the mixture has boiled one minute, remove the mixure from the heat. If foam has formed as in the picture below, use the edge of a large metal spoon to scrape the foam from the top of the jam mixture.
Remove the jars from the warming canner and fill them to 1/4 inch headspace. (If I am making something I am considering entering into a fair, I fill the jar nearly full. As the jelly cools, it will almost always contract inside the jar to the proper headspace that judges look for.) Make sure to wipe the rim of each jar clean and seal with a lid and ring. The jars in the photo below do not yet have a ring so that you can see the headspace left in the jar.
Place the sealed jars in the canner and process for 10 minutes. Remove the jars from the canner. Set the jars in a draft free area and do not disturb them for twenty-four hours.
I hope you enjoy the recipe and find beauty in the world around you today!
Until we meet again, may you be blessed! 💕
Wednesday, September 11, 2019
Autumn Harvest Pie
I have been working on this pie for a while, and have hesitated to share it. The crust on this recipe can easily get over done around the edges, but I personally don't mind it. The edges could be covered with foil or you could use a traditional pie crust recipe. To to me, though, a traditional crust would just take away the essence of what the pie is and represents. I want to enjoy all the harvest goodness!!
Autumn Harvest Pie
Crust ingredients:
One sleeve graham crackers
3 T butter, melted
1/4 c shredded coconut
1/4 c dried cranberries
1/4 c pecan pieces
1/4 c brown sugar
1/2 t maple maple flavoring
Pie Filling Ingredients:
1 can pumpkin puree
8 oz cream cheese, softened
3/4 c dark brown sugar
1/2 c can milk
1/2 c apple cider
2 large eggs
1 T corn starch
1 t cinnamon
1 t nutmeg
1/2 t ground ginger powder
1/2 t salt
1 pinch fine black pepper
Directions:
Melt butter.
Place the graham crackers in a food processor. Crumble them as you add them or pulse a couple times to break them up.
Add all the other crust ingredients except the melted butter to the processor. Pulse until ingredients form fine crumbs.
Set processor to mix, and slowly pour in the melted butter.
Press the crust ingredients into a pie plate. Use a deep dish, save part of the mixture in the freezer for a future pie, or place some in a ramekin. I chose the latter, but I snapped the photo before I made up my mind. I forgot to take another photo before I poured the filling. Oops! Please forgive me. 😁
Autumn Harvest Pie
Crust ingredients:
One sleeve graham crackers
3 T butter, melted
1/4 c shredded coconut
1/4 c dried cranberries
1/4 c pecan pieces
1/4 c brown sugar
1/2 t maple maple flavoring
Pie Filling Ingredients:
1 can pumpkin puree
8 oz cream cheese, softened
3/4 c dark brown sugar
1/2 c can milk
1/2 c apple cider
2 large eggs
1 T corn starch
1 t cinnamon
1 t nutmeg
1/2 t ground ginger powder
1/2 t salt
1 pinch fine black pepper
Directions:
Melt butter.
Place the graham crackers in a food processor. Crumble them as you add them or pulse a couple times to break them up.
Add all the other crust ingredients except the melted butter to the processor. Pulse until ingredients form fine crumbs.
Set processor to mix, and slowly pour in the melted butter.
Press the crust ingredients into a pie plate. Use a deep dish, save part of the mixture in the freezer for a future pie, or place some in a ramekin. I chose the latter, but I snapped the photo before I made up my mind. I forgot to take another photo before I poured the filling. Oops! Please forgive me. 😁
Set the crust aside, and add the cream cheese to a large bowl. Beat the cream cheese until it is fluffy.
Gradually beat in the milk and cider until smooth.
Mix in the cornstarch.
Add the remaining ingredients, and mix well.
Once the ingredients are mixed well, pour the pie filling into the crust.
Bake the pie at 425° for 15 minutes. Turn the oven to 350° and continue to bake for another 35-45 minutes until the filling appears nearly set when shaken. Cool 1 hour.
This crust is dark to begin with. Because of the ingredients, it will get a lot darker during baking. Though the color was dark in nature, the only part of my crust that got a little too done were the very top edges that peeked out of the filling. You could tent the edges with foil or use crust shields, but I'm no professional baker. I rather like the rustic look.
When the pie has cooled top it with some whip cream and enjoy! I couldn't wait for mine to cool completely!
Happy fall! I hope you like it!
Until we meet again, may you be blessed!
Tuesday, September 10, 2019
Salsa
Edited to add: The writing of this blog post was originally begun in 2015. I didn't realize the post had not been completed or posted until today when another friend was asking about the recipe.
Oh sweet friends! What a joy it is to visit with you again finally! God has been so good to me! He has so richly blessed me and has been teaching me and keeping me in awe of His mighty love and grace through my garden!
I have been so busy with life and taking care of the garden and canning that I haven't had much free time lately to write full blog posts! The most I have been able to do until now is quickly post pictures and short descriptions or status updates on Facebook of my gardening adventures. I have just had the greatest joy watching God at work there! I invite you to take a look at my album there titled "In the Garden" if you are able!
My first garden, a Back To Eden Garden, has not disappointed in the least! Until we had really high temperatures and lack of rain recently, the garden was so big and lush and beautiful! I have had some weeds, but they haven't been overwhelming, and they have been very easy to remove. I even left it to tend itself for a couple weeks! :)
When I did the bulk of my planting, what I wanted most was enough tomatoes to make salsa and marinara/pizza/spaghetti sauce (We use the same sauce for all three. :) ) and my pumpkins, the sugar pumpkins and PA Dutch Crookneck. The tomatoes were the most important, though! Well, as it turned out, there were very few things I planted that were not successful! Praise God! He did it, not me! I have a terrible brown thumb! The only things I planted that didn't produce were a few herbs! I can't wait to plant my fall crops!
As I stated before, tomatoes were the most important, and God blessed them! There were a couple times I just knew I was going to lose my plants, but God kept them going! I had enough tomatoes to make my salsa and sauce and still have tomatoes left! I think I may end up doing another batch of spaghetti sauce and can the rest of the tomatoes if there are any left over.
Today, though, I will share the salsa recipe since I have had some ask for it. A couple years ago, my dear friend, Barbara Ann and her daughter-in-love, Lisa, who has also now become a dear friend, came over to my house to help me can my tomatoes. I was still very new to canning then. I was quite overwhelmed with all that went on in such a short period of time. You can read about that experience here. When we were all done, I had lots of jars of food and no clue how any of it got done! :D I didn't even have recipes! Fast forward to this week! Boy did I miss their help! For some reason, making salsa and sauce completely intimidated me! I guess it was because I didn't have a flow of procedures to rely on. I didn't know the most efficient way to get it all done. Well, the tomatoes wouldn't wait, and I just had to jump in head first! I felt like I was slow as molasses on a cold winter morning, but everything is finally done! This is what I did.
First I gathered all the ingredients so that I wasn't constantly stopping to pull something out.
Next, I chopped up all the vegetable except the tomatoes in the food processor trying to be careful not to chop too finely.
I have several friends who do not peel their tomatoes before making their salsa, so I decided to give it a try. I just remove some of the core and any rough or bad spots. Then I ran them through the processor moved them to the strainer perched over a dishpan to let them drain like this.
You don't need to drain your peppers and onions and garlic! I just wasn't thinking. I dumped this and the juice into the pot before I started on the tomatoes, and added a little Tony's Seasoning on top of it. For some reason, I didn't take a picture of that! Gasp! :) This is just to give you an idea of one way to drain your tomatoes. Just remember not to dump the juice from the tomatoes!! I worked in small batches for the tomatoes and measured as I went to avoid cutting up too many tomatoes. Once they were chopped and measured out, they were added to the pan with the other vegetables.
Once I had all the tomatoes in, the other spices and ingredients were added and stirred together.
I got my jars into another large pot to heat them up. Once my jars started boiling to sterilize, I turned up the heat under the salsa, mixed the clear jel with some of the reserved tomato juice, poured it into the salsa, and let the salsa cook until it was thickened to my liking.
Once it was thick enough, I filled the jars to 1/2 inch headspace, wiped the rim, sealed with lids and rings, and processed for 15 minutes in a water bath. Make sure the jars are covered with at least an inch of water, and start timing only after the water reaches a boil.
Canned Salsa Recipe
22 c tomatoes, chopped fine and drained: reserve 2 c juice
12 cloves garlic, minced
6 lg bell peppers
4-6 jalapenos
7 medium to large onions
3 ribs celery
3/4 c vinegar
Scant 1/4 c salt
1 T dried oregano
1 t cumin
1 pack Mrs. Wages salsa packet
1 T black pepper
1 c sugar
3/4 c clear jel
Tobacco sauce and Tony's Cajun seasoning to taste
Chop all the vegetables except the tomatoes in a food processor. Place them in a large stock pot. Core the tomatoes and chop them. Place them in a strainer over a large bowl or other container to drain. Dump the drained tomatoes in the pot with the other vegetables. Reserve 2 c of the juice. Add the vinegar, spices, and sugar. Bring the mixture to a boil, stirring frequently. Make sure to taste and adjust the Tabasco and Tony's seasoning. Add the reserved juice to the 3/4 c clear jel. Add the mixture to the salsa and continue cooking until the salsa reaches desired consistency. Fill hot jars to 1/2 inch headspace. Remove air pockets, wipe rims clean, and seal jars. Water bath jars for 15 minutes.
Thanks for dropping by! I hope you enjoy the recipe!
Until we meet again, may you be blessed!
*To insure the safety of your canned goods, make sure to follow all safety guidelines issued by the USDA.
Oh sweet friends! What a joy it is to visit with you again finally! God has been so good to me! He has so richly blessed me and has been teaching me and keeping me in awe of His mighty love and grace through my garden!
I have been so busy with life and taking care of the garden and canning that I haven't had much free time lately to write full blog posts! The most I have been able to do until now is quickly post pictures and short descriptions or status updates on Facebook of my gardening adventures. I have just had the greatest joy watching God at work there! I invite you to take a look at my album there titled "In the Garden" if you are able!
My first garden, a Back To Eden Garden, has not disappointed in the least! Until we had really high temperatures and lack of rain recently, the garden was so big and lush and beautiful! I have had some weeds, but they haven't been overwhelming, and they have been very easy to remove. I even left it to tend itself for a couple weeks! :)
When I did the bulk of my planting, what I wanted most was enough tomatoes to make salsa and marinara/pizza/spaghetti sauce (We use the same sauce for all three. :) ) and my pumpkins, the sugar pumpkins and PA Dutch Crookneck. The tomatoes were the most important, though! Well, as it turned out, there were very few things I planted that were not successful! Praise God! He did it, not me! I have a terrible brown thumb! The only things I planted that didn't produce were a few herbs! I can't wait to plant my fall crops!
As I stated before, tomatoes were the most important, and God blessed them! There were a couple times I just knew I was going to lose my plants, but God kept them going! I had enough tomatoes to make my salsa and sauce and still have tomatoes left! I think I may end up doing another batch of spaghetti sauce and can the rest of the tomatoes if there are any left over.
Today, though, I will share the salsa recipe since I have had some ask for it. A couple years ago, my dear friend, Barbara Ann and her daughter-in-love, Lisa, who has also now become a dear friend, came over to my house to help me can my tomatoes. I was still very new to canning then. I was quite overwhelmed with all that went on in such a short period of time. You can read about that experience here. When we were all done, I had lots of jars of food and no clue how any of it got done! :D I didn't even have recipes! Fast forward to this week! Boy did I miss their help! For some reason, making salsa and sauce completely intimidated me! I guess it was because I didn't have a flow of procedures to rely on. I didn't know the most efficient way to get it all done. Well, the tomatoes wouldn't wait, and I just had to jump in head first! I felt like I was slow as molasses on a cold winter morning, but everything is finally done! This is what I did.
First I gathered all the ingredients so that I wasn't constantly stopping to pull something out.
| No, I didn't put dehydrated chicken in it. It just happened to be sitting there since they are the dogs treats I made the other day. :) |
I have several friends who do not peel their tomatoes before making their salsa, so I decided to give it a try. I just remove some of the core and any rough or bad spots. Then I ran them through the processor moved them to the strainer perched over a dishpan to let them drain like this.
You don't need to drain your peppers and onions and garlic! I just wasn't thinking. I dumped this and the juice into the pot before I started on the tomatoes, and added a little Tony's Seasoning on top of it. For some reason, I didn't take a picture of that! Gasp! :) This is just to give you an idea of one way to drain your tomatoes. Just remember not to dump the juice from the tomatoes!! I worked in small batches for the tomatoes and measured as I went to avoid cutting up too many tomatoes. Once they were chopped and measured out, they were added to the pan with the other vegetables.
Once I had all the tomatoes in, the other spices and ingredients were added and stirred together.
| Ahhh! Doesn't that look amazing and delicious? |
I got my jars into another large pot to heat them up. Once my jars started boiling to sterilize, I turned up the heat under the salsa, mixed the clear jel with some of the reserved tomato juice, poured it into the salsa, and let the salsa cook until it was thickened to my liking.
Once it was thick enough, I filled the jars to 1/2 inch headspace, wiped the rim, sealed with lids and rings, and processed for 15 minutes in a water bath. Make sure the jars are covered with at least an inch of water, and start timing only after the water reaches a boil.
Canned Salsa Recipe
22 c tomatoes, chopped fine and drained: reserve 2 c juice
12 cloves garlic, minced
6 lg bell peppers
4-6 jalapenos
7 medium to large onions
3 ribs celery
3/4 c vinegar
Scant 1/4 c salt
1 T dried oregano
1 t cumin
1 pack Mrs. Wages salsa packet
1 T black pepper
1 c sugar
3/4 c clear jel
Tobacco sauce and Tony's Cajun seasoning to taste
Chop all the vegetables except the tomatoes in a food processor. Place them in a large stock pot. Core the tomatoes and chop them. Place them in a strainer over a large bowl or other container to drain. Dump the drained tomatoes in the pot with the other vegetables. Reserve 2 c of the juice. Add the vinegar, spices, and sugar. Bring the mixture to a boil, stirring frequently. Make sure to taste and adjust the Tabasco and Tony's seasoning. Add the reserved juice to the 3/4 c clear jel. Add the mixture to the salsa and continue cooking until the salsa reaches desired consistency. Fill hot jars to 1/2 inch headspace. Remove air pockets, wipe rims clean, and seal jars. Water bath jars for 15 minutes.
Thanks for dropping by! I hope you enjoy the recipe!
Until we meet again, may you be blessed!
*To insure the safety of your canned goods, make sure to follow all safety guidelines issued by the USDA.
Subscribe to:
Posts (Atom)