Pages

Tuesday, December 22, 2015

Roasted Turkey

Thanksgiving has come and gone, and now Christmas is just a few days away! Where has time gone!? Have you already got your Christmas plans figured out?

Today, I simply must sit down and make my list for the grocery store, or we are going to be eating dry oatmeal all day for Christmas! Okay, we would do a little better than that, but I do seriously have to get my list done and get to the store today.

If you need a little inspiration, let me help! I will help you make this meal a family favorite! Since my last post was cranberry sauce, you already have a start to your meal!
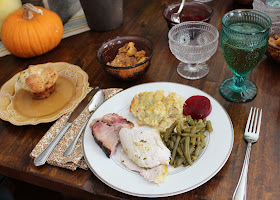
Yes, I know all the pieces aren't in the correct place, but that is a story for
another day. :)
What do you like to have on Christmas? Just like we do at Thanksgiving, we like to have a ham and a turkey. Perhaps you have a turkey thawing in your refrigerator waiting, for the big day, but perhaps you aren't excited by the thought of the dry, dull, tasteless meat. Never fear! I have the cure for that! Your first step will be your very best friend in cooking a turkey: brine! Not a boring brine, but beautiful brine! Don't run! It's not hard in the least little bit, and it will leave your cooked turkey so tender and moist and full of flavor! We were trying to catch the juice before it ran in the floor when we carved ours on Thanksgiving.


Brine
1-1/2 c kosher salt
3/4 c sugar, brown or white
5 sprigs sage
5 sprigs thyme
2 sprigs rosemary
peel of one orange or tangerine 
5 cloves garlic, crushed
1 T black peppercorns
4 or 5 cups warm water

*My store didn't have all the herbs I needed in individual packs, so I picked up a pack of fresh herbs that had 'Poultry Herbs' written on the front. It turned out to have all the herbs listed above.

In a large pan, combine salt, sugar, and warm water. Stir to dissolve salt and sugar. Add remaining ingredients. Add cool water to bring the temperature of the brine down to room temperature or below. You don't want to add a warm brine to your cold turkey. Remove anything that may be in the cavity of the turkey. Keep the neck and/or organs to simmer for your gravy. Place your turkey in a large stockpot. Pour the brine in and over your turkey. Fill the rest of the way with cold water. Make sure the turkey breast is down in the water. It's okay if the water doesn't cover all of the back. Put the pot in the refrigerator and that's it for 8-18 hours! Take a few minutes during this period to make an herb butter. Directions are below

Make sure not to leave the turkey in the brine longer than 18 hours; it will get too salty. At the end of that time, remove the turkey. Rinse and dry the turkey. Put it on a pan, and put it in the frig overnight. The next day, remove the turkey from the refrigerator and let it come to room temperature and rub with herb butter before cooking.

The next recipe will be your other greatest friend when making your turkey! This is my absolute favorite part! While your turkey is in the brine, leave one to one and a half sticks of butter out to soften.


Herb Butter
1 - 1-1/2 sticks of unsalted butter
1/2 t pepper
1/2 t salt
1/2 t onion powder
1/2 t garlic powder
1/4 t ground turmeric
1/8 t ground sage
1 t dried basil leaves
1/4 t dried thyme leaves
1/8 t celery salt
2 pinches nutmeg
1/4 t crushed dried rosemary leaves

In a bowl, blend the butter and herbs. Place in the refrigerator until ready to use if you make it ahead of time. Just be sure to pull it out in time for it to soften before using it to rub your turkey.


The turmeric will give it a strange color, but it is so good!
Rub your turkey with the butter. 


Bake your turkey according to your directions. I cooked mine in my electric roaster for four hours.  And viola! A beautiful, delicious turkey. Make sure to let it rest at least ten minutes before carving.


Reserve some of the pan drippings for your gravy!! Happy cooking and eating! Merry Christmas!

Until we meet again, may you be blessed!

Tuesday, November 24, 2015

Cranberry Sauce


Good evening, all!

What a busy summer we had! Autumn continues to be just as busy! I simply cannot believe that Thanksgiving is here already! Have you been making preparations for the big day? My little family will be staying home for the first time ever to have Thanksgiving with just the four of us here in the Meadow of Simple Blessings. It will be strange not to be surrounded by so many family members, but I am so excited! I have already started making preparations.

Tonight, I put the turkey in a brine I made. That crazy thing has been in the refrigerator since Saturday, but it is still frozen. Nevertheless, into the brine it went, giblet pack and neck and all! lol! I have never roasted a turkey before, so this is sure to be an adventure! Just look at the brine, though! Isn't it pretty?!

haha! I didn't notice until now that it looks like a face!
After getting done with that, I decided to make homemade cranberry sauce. Boy, am I glad I did! I am not a huge fan of that funny looking stuff that plops out of the can, but this turned out so well, I had to make an emergency run to the computer just for all of you! I didn't want you to miss out in case you happen to have free time tomorrow and want to try it! heehee! In fact, I was in such a hurry, I didn't get a pretty picture of the finished jelly with my good camera! I had to get the image I made with my phone off of my Facebook page! lol! I'll even give you the recipe before I give the step by step instructions! If you don't have time to make it for Thanksgiving, perhaps you can whip up a batch for Christmas!


Cranberry Sauce
2 12oz bags of cranberries
Juice of 2 oranges plus enough water to make 1-1/3 c liquid
1/8-1/4 t ground cinnamon
2 c sugar
1/2 packet liquid pectin

Wash and sort berries. Remove any under ripe or mushy berries. Put liquid in a large stock pot and bring it to a boil. Add berries. Let them cook 5-10 minutes. The berries will pop. Strain berries through a mill or sieve. Discard all the fibrous remains. Add pectin to the strained berries. Bring this mixture to a boil, and add all the sugar at once. Stir continuously, and bring the mixture back to a rolling boil. Once at a boil, boil exactly one minute. Remove the jelly from heat. Skim any foam with a metal spoon. Fill jars to 1/2 inch headspace and seal with a lid and ring. Process in a boiling water bath for 15 minutes for half pints and pints.

Step-by-Step in Pictures
Before starting, place three or four jelly jars in your canner and keep the jars warm until you are ready to fill the jars. Also, go ahead and place the lids in water to simmer on low heat until you are ready to use them. Lastly, measure out your sugar and open the pectin. To keep the pectin from falling over and spilling, you can place it in a small cup to keep it upright until you are ready to use it. Now it's time to begin!

Wash and sort berries. 


Let them drain while you juice two oranges. Throw the peels in a brine if you are making one! ;)


Pour this liquid into a measuring cup.


Add enough water to equal 1-1/3 cup of liquid.


Since my cup only held one cup, I had to add more water after I dumped this.
Pour all the liquid into a large stock pot, add cinnamon, and bring the mixture to a boil.


When the liquid has come to a boil, add all the berries.


Cook the berries for five to ten minutes until half to most of the berries have popped and the mixture feels mushy.

Using a mill or a sieve, strain the berries into a sauce. If you are like me and not lucky enough to have a food mill, one of these strainers will work. Just use the spoon to stir and press the berries against the metal. Keep going. Most of the mixture will go through leaving mostly solids in the strainer. Just be patient. :)


This is the beautiful sauce that you will be left with.


Clean out you stock pot. You don't want all those yucky leftover solids in your sauce from where you cooked the berries. Once it's clean, pour the sauce back in with the half packet of pectin. 


Stir as you heat it to a boil. Once at a boil, pour all the sugar in at once.


Stir continuously, and bring the mixture back to a boil. Once at a rolling boil, time for exactly one minute and remove from heat. Skim any foam from the jelly using the edge of a metal spoon. I dare you to try not to taste it!

Fill your jars to 1/2 inch headspace and process in a boiling water bath for 15 minutes for half pints and pints.


Remove the jars from the water bath and let them cool on a towel for 24 hours.


I hope you enjoy the recipe!

Have a wonderful, Thanksgiving!

Until we meet again, may you be blessed!

Tuesday, August 4, 2015

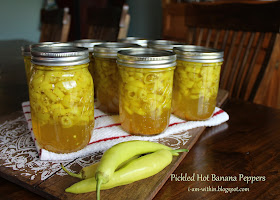
Sweet Pickled Hot Banana Peppers


The story behind this recipe was a little funny here at the Meadows of Simple Blessings.

A while back, on one of our trips to Texas, I bought some hot pepper rings. I remember my husband eating them, saying how good they were, and that he would like some more. I was so excited because I knew the exact peppers I needed to make them. The trouble was, I didn't have any last year, so I couldn't make them.

Well, this year, my friend Barbara Ann grew some in her beautiful, plentiful garden...And boy did she! She has had produce galore come from that beautiful garden, and I have been the most gracious recipient of more than one item of hers! In a round about way, I ended up with two plastic grocery bags of those beautiful peppers! Some of them I used in the Cowboy Candy from my last post. The rest I used in this recipe.

Oh, I was soooo excited to get these peppers! I was going to do something so special and exciting for my husband! He was going to be so excited and impressed that I was making the peppers he liked so much in Texas! I remembered the day I got the call to come get them. I practically danced along as I hurried to his shop to tell him where I was going!

The first day, I made the batch of Cowboy Candy. He didn't really say anything, but it was okay. They didn't look like the peppers I knew he liked. The second morning, I was just finishing up slicing all those peppers when he awoke and came to the kitchen. He finally just stopped and stared at the bowl of sliced pepper...Oh he must be so wowed that he is going to have so many peppers to enjoy!...Wait...no smile, only a confused look...huh???...Finally, he asked why I had sliced them all up. He was met only with my confused stare...What was I supposed to do with them? I'm making his peppers he liked so well!...I finally found the words to explain I was doing the peppers he had eaten, liked so well, and said he wouldn't mind more of. Again he just looked at me, finally tellling me these weren't the peppers he was talking about. He wanted the small, whole peppers. I was deflated and crushed! lol! What??? He had a good chuckle! Either he had forgotten about eating the rings, or I dreamed it. Either option was quite possible! :) Either way, I made lots and lots of pickled peppers, and today I share the recipe with you!

This is the recipe for the brine. I had to double or triple the recipe to have enough for all my peppers.

Pickled Hot Banana Peppers
4 c water
4 c white vinegar
1 c sugar
1/2 t turmeric
1 t mustard seeds
1 t celery seeds
1 clove of garlic for each jar
1/2 t salt for each jar
As many hot banana peppers as you wish to process sliced into rings.

In a large pan, bring the water, vinegar, sugar, mustard seeds, and celery seeds to a boil. (This brine may need to be multiplied depending on how many peppers you wish to process.) Pack hot jars with peppers leaving 1/4 inch head space. To each jar of peppers, add one clove of garlic and 1/2 teaspoon of salt. Pour hot brine over peppers to 1/4 inch headspace. Seal and process in a boiling water bath for 10 minutes.

Process in Pictures:

Before slicing peppers, place your jars in your water bath canner to heat. Also go ahead and get your bine ingredients into the pot. Start heating that when you are almost done with slicing to save a little time.

Using gloves, slice your peppers into rings. Be sure do discard the stem. Yikes! I was almost ready to can before I remembered I was supposed to be taking pictures! If I remember correctly, this was right at six pounds of peppers.


Turn up the heat under your brine to start bringing it to a boil while you pack the jars. Pack the jars with peppers to 1/4 inch headspace.


Add 1/2 teaspoon salt and one clove of garlic to each jar. I didn't have fresh garlic, so I just used the canned minced garlic.


The garlic and salt can be put in the jars
first, if you like. Whatever tickles your
fancy is fine. :)
Make sure brine has come up to a boil.


Ladle the hot brine over the peppers leaving 1/4 inch headspace.


Remove air bubbles, wipe the rim clean, and seal.


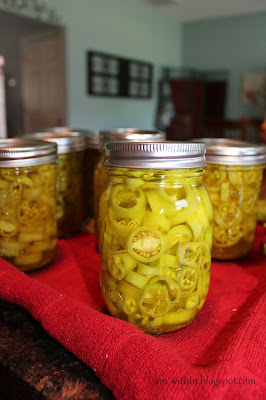
Aren't they so pretty!?
I had some leftover peppers and brine I didn't want to waste, so I threw them all in a jar, too.


Process pints in a hot water bath 10 minutes, and voila! Do not disturb your jars for 24 hours.


Until we meet again, may you be blessed!

Monday, August 3, 2015

Cowboy Candy with Hot Banana Peppers


It's been a terribly busy, but fun, canning season here in the Meadow of Simple Blessings!

I wanted to give you this quick little recipe in case you find yourself blessed with an abundance of hot peppers this year.

Traditionally, Cowboy Candy is made with jalapeno peppers, but it takes a lot of them. I was blessed with so many banana peppers from my friends Mari and Barbara Ann, that I knew immediately, I wanted to try to make the cowboy candy for my husband using some of the banana peppers. I also made a lot of regular Hot Pickled Peppers, too. I'll share that in the next post. This same recipe can be found in many Pinterest posts, so please do not think this recipe is mine. Mari, the same friend who gave me the peppers, actually gave me the recipe. When I had a question about the recipe and couldn't reach her, I tried to see if I could find the answer online. That is how I discovered the popularity of the same recipe! In case you haven't seen it before, I present it to you today!

Cowboy Candy with Hot Banana Peppers
3 lbs hot banana peppers, fresh and firm
          (Sweet peppers may be substituted.)
2 c Apple cider vinegar
6 c granulated white sugar
1/2 t turmeric
1/2 t celery seeds
3 t granulated garlic
1 t ground cayenne pepper

Wearing gloves, remove stems. Slice peppers into uniform 1/8-1/4 inch rounds. Set aside. In a large pot, bring vinegar, white sugar, turmeric, celery seeds, garlic and cayenne pepper to a boil. Reduce heat and simmer for five minutes. Add pepper slices and simmer exactly four minutes. Use a slotted spoon to transfer the peppers, loading into clean, sterile canning jars leaving 1/4 inch headspace. Turn up the heat under the pot with the syrup, and bring it to a full rolling boil. Boil hard for six minutes. Use a ladle to pour boiling syrup into jars over slices. Remove air bubbles. Seal. Process in a hot water bath for 10 minutes for half pints or 15 minutes for pints.

Picture tutorial:

Wearing gloves, remove stems and slice peppers into rounds. Set them aside.


Just as as side note, I like to have everything as organized as I possibly can to help things run along quickly and smoothly. While I sliced peppers, I started heating the jars. I let them boil for a few minutes and leave them on low heat as I work so they stay hot until I need them. 

In a large pot, combine sugar, vinegar, turmeric, celery seeds, garlic, and cayenne. Bring it to a boil. Reduce heat and simmer for five minutes.


While waiting for this to come to a boil, I cleaned up from cutting peppers and organized my work station so that I could fill jars as quickly and seamlessly as possible. I had the potholder to have a place to sit the hot pan when it was ready. I also had a jellyroll pan lined with a towel on which to place my hot jars when I was ready.

hmm...potholder is looking a little rough there! I told you it's been busy!
Please pardon the bell peppers and dehydrator. I was also working on dehydrating those at the same time.

Add pepper slices, and simmer exactly four minutes. Use the latter end of this time to move jars to your work station.


Using a slotted spoon, transfer peppers to hot jars, filling to 1/4 inch headspace.


Place the pan of syrup back on the stove. Turn up the heat under the pan with the syrup and bring to a full, rolling boil. Boil hard for six minutes.


Use a ladle to pour boiling syrup into jars over slices.


Remove air bubbles, seal, and process half pints 10 minutes or pints 15 minutes.


Until we meet again, may you be blessed!

Amish Peanut Butter Spread

Hi All!

I made this the other day, and my friend, Morgan, asked me to write up the tutorial ASAP. Ummm....I got busy and completely forgot about it. So sorry, Morgan! Here it is just for you and anyone else who would like to try it!

This recipe is not unlike several others out there except it was made very near the middle of Mennonite country here in Georgia. My family loves this stuff! Try it on rolls, bread, waffles, pancakes, the spoon, your finger, or whatever else may suite your fancy! heehee!

Amish Peanut Butter Spread
2 c brown sugar
1 c water
2 T light corn syrup
1 t maple flavoring
18 oz peanut butter
7 oz marshmallow fluff

Combine the first four ingredients in a saucepan; boil for one minute. Remove from heat, and cool completely. Mix peanut butter and marshmallow creme. Then add the peanut butter mixture to the boiled mixture. Beat well. 


For those, like me, who like the steps in photos....

Combine the brown sugar, water, corn syrup, and maple flavoring in a saucepan and boil for one minute. Remove it from the heat, and let it cool.


Mix the peanut butter and the marshmallow creme. I can't imagine trying to do it without a mixer!


Having a little helper is always fun! Poor buddy woke up that morning with
a terribly eczema outbreak.
Keep mixing!
Make sure to stop and scrape sides and bottom at least once while mixing.
Pour in the boilded mixture.


Sir Mix-a-Lot loves helping in the kitchen!
Beat well.

Getting there! Keep mixing!
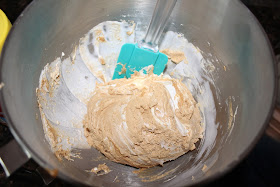
Now! Oh my! Doesn't it look wonderful!? So smooth and creamy!
Pour into clean jars and enjoy! I was told to store my jars in the refrigerator.


Until we meet again, may you be blessed!