Sunday, September 30, 2018

Cheesey Chicken Chowder Base


A few years ago, one of my Montezuma group of friends was pregnant. Our group of friends got together to can soups to gift her so she would have some easy meals once the baby arrived. We also turned it into a soup swap. My friend, Kristy, made Cheesey Chicken Chowder. It was so good, and my children loved it!

A while back we were wanting it again, so I asked Kristy for the recipe. Somehow, I lost it, but I asked for it again just a few days ago.  Since procrastination was the sneaky culprit which caused me to lose the recipe the first time, I went ahead and put in the little brain work and converted the recipe to be suitable for canning in the proportions I needed, and I wrote up the directions to make the chowder once the base has been canned. To make sure I can always get to the recipe, I am sharing it with you here!

This recipe takes some time, but it is very easy.

The first step was to cook a family size pack of chicken breasts. I put mine in a large stock pot, season the meat well with sea salt, black pepper, seasoning salt, several shakes of soy sauce, several shakes of Worcestershire sauce, and 1/8-1/4 teaspoon of turmeric.


Cover the meat with water and let it boil until done.


Once the chicken was on the stove, I began to prepare all the vegetables. I especially wanted to do the potatoes first so that they would have time to soak and release a lot of their starch to prevent the canned soup from being cloudy. I made small dices because thatst what I like best in my chowder.


I put them in water as I diced to prevent Browning and put them in the refrigerator when I was done to let them soak until needed.


This recipe only used a little more than half of my pack of celery. Again, I kept my dicing small. Chop, chop!


If you hang around this blog very long, you will learn I absolutely detest, hate, abhor dicing onions! I'm always quite sure imI going to die when I have to cut up an onion! Imagine the horror of having three to dice!! I diced as small I could and still survive. I had to take several breaks to stop crying, but I got the job done! Cooking is a labor of love, and love hurts sometimes! 😆
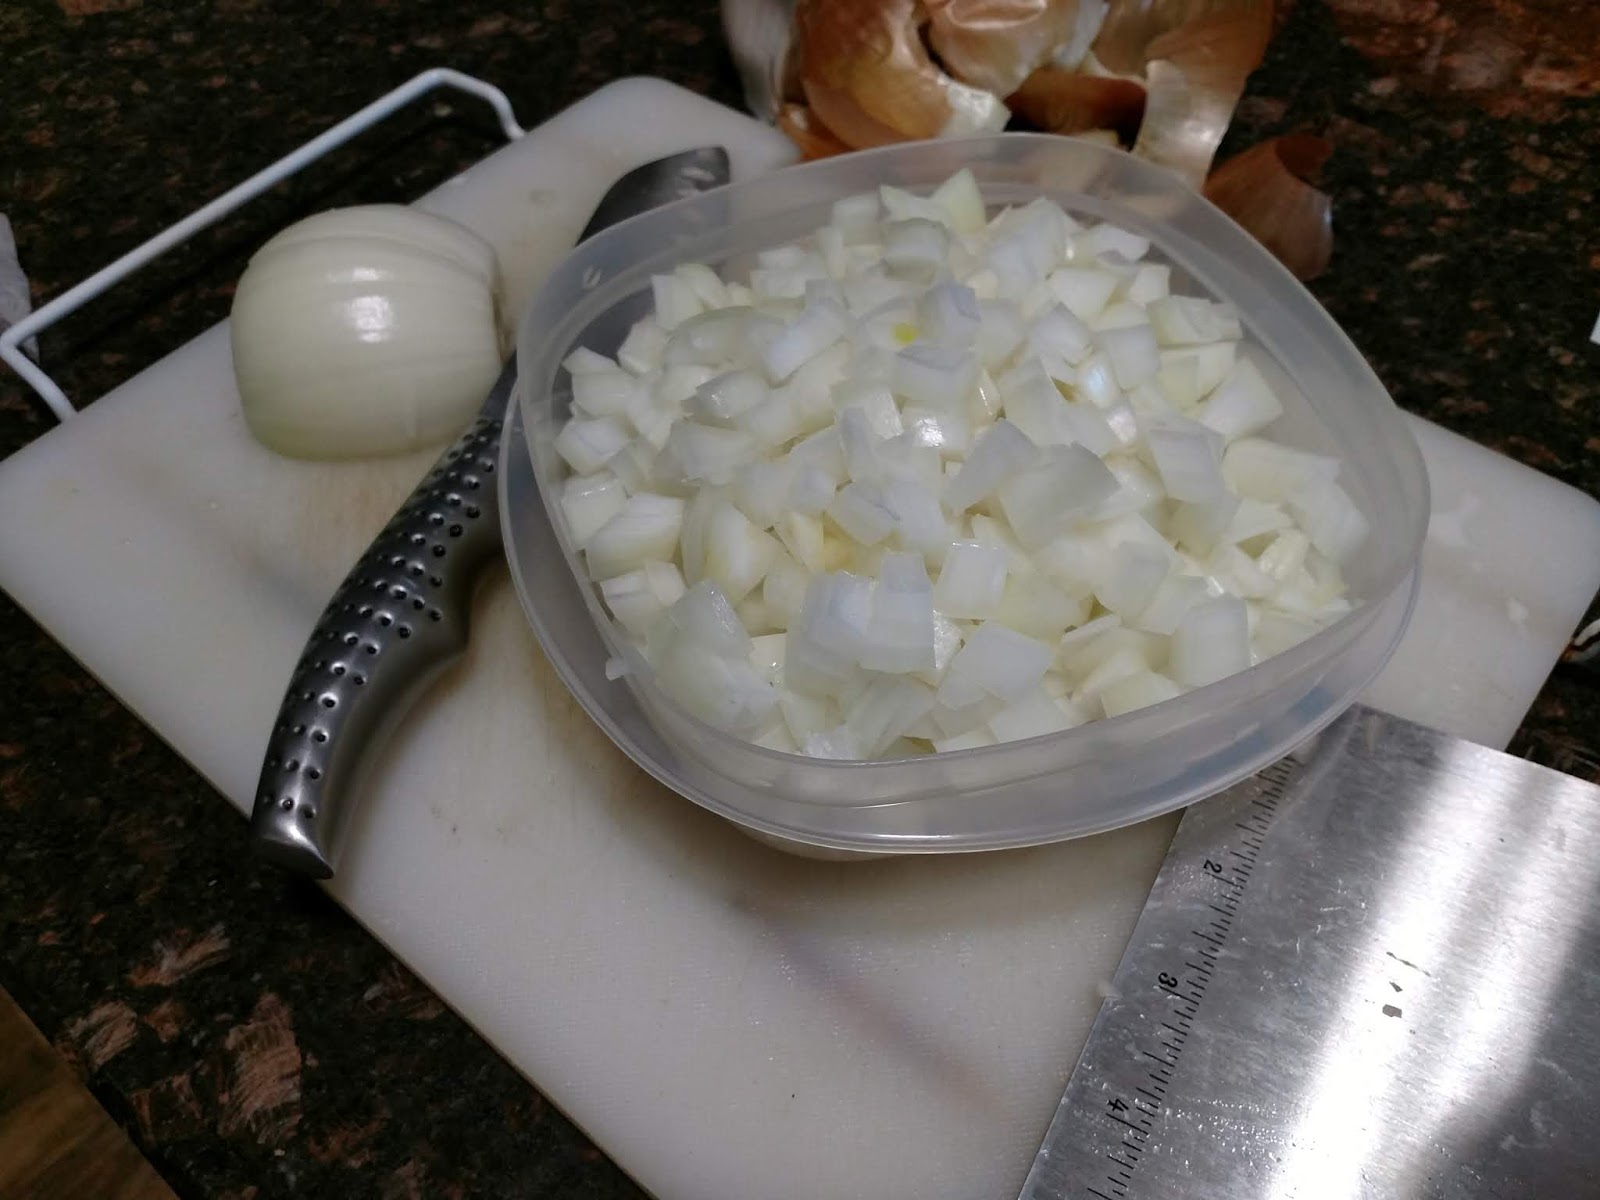

I put the veggies in the frig to hang out at their fair well party until it was needed.

Once the chicken was done, I let it cool until it was warm enough to handle comfortably. Then it was sliced and diced into small pieces similar to the veggies. I measured it out as I chopped.


Then all the ingredients were gathered together to begin packing the jars. I made sure to drain the water off the potatoes. Notice, too, the carrots joined us. I love the look of the Matchstick carrots in my canned soups, so I saved my self a little extra work and bought them precut. I thanked myself.


This is where the fun part begins! I began layering the ingredients in my jars, dividing the ingredients as evenly as I could.


Isn't it pretty?

Next, I began filling the jars with chicken broth. Make sure to fill the jars to one inch headspace for proper canning. I like to use my funnel to keep the jar rims as clean as possible during filling.


To make sure the rims are clean and to reduce the likelihood of a seal failure, I like to wipe the rims with a napkin and vinegar when using something greasy.


Lastly, the jars are sealed with a lid and ring, and the jars are placed in the canner. I love my new canner! I was able to can all twelve quarts at one time!


The jars are canned at 10 pounds for a weighted canner or 11 pounds for a guaged canner for 90 minutes where I live. Make sure you make adjustments for altitudes above 1000 feet if you are trying this recipe.

Here they are all nice and pretty, right out of the canner!


Cheesey Chicken Chowder Base
7 32oz chicken broth
8-9 c cooked, diced chicken
2-3 onions, finely chopped
3-6 potatoes, diced
3 c celery, diced
1 10oz. bag Matchstix carrots (about 1/8 -                    1/4 c per jar)

Layer chicken, onions, potatoes, celery, and carrots in 12 quart jars, dividing vegetables evenly among the jars. Fill each jar with chicken broth, leaving 1 inch headspace. Wipe rims of jars with vinegar and a paper towel. Seal with flat lids and rings until finger tight. Place jars in canner and process jars for 90 minutes at 10 pounds pressure for a weighted canner or 11 pounds for a guaged canner. Make adjustments for altitude, if needed.

To prepare chowder:
Pour contents of jar into an adequate stockpot. Heat to boiling. Remove from heat. Add one quart of milk per jar used. Add desired amount of cheese and stir well until melted. Add two tablespoons of butter if desired. Adjust seasoning to taste. I use salt and soy sauce. Flour can be used to thicken if desired, but I never thicken mine.

I hope you get the chance to try this recipe and that you enjoy it! I enjoyed preparing it to present to you!

Until we meet again, may you be blessed!
*To ensure your safety, follow the canning regulations issued by the USDA.

Sunday, June 3, 2018

Lemon Balm Tea


Today's post is a fun one for me!

I have been growing lemon balm in my garden the last two years. Last year, I didn't do anything with it. This year, however, I was determined to make that plant shine in my kitchen! Today, therefore, I made Lemon Balm Tea!

My husband has a friend over who can help him with a few projects he has been wanting to get to for a while. I figured since it is so hot and humid, they need to stay well hydrated and refreshed. Right!? Perfect guinea pigs!!

To make the tea, you will need two packed cups of whole lemon balm leaves.


Make sure to wash the leaves well in cold water and add them to a two quart jar or other container you may have that is safe for boiling water.


Bring two quarts (or close to it) of water to a rolling boil, and pour the water over the leaves.


With a spoon, push the leaves down and bruise them a bit to release the flavor and beneficial oils from the leaves.


It doesn't take long for the color of the water to start to change. Only let the leaves steep for ten minutes, though. Isn't it so lovely?


While that is doing its beautiful thing, measure out a cup (more or less depending upon your tastes) of sugar into a one gallon container. Stir in one or two quarts of water to dissolve the sugar.


After ten minutes, the tea is done. I think it is just so pretty! It just amazes me that this all started one very cold day with a teeny-tiny seed I planted inside!


Using a strainer to catch the leaves, pour the tea into the gallon container with the dissolved sugar.


Add extra water, if needed, to fill the gallon container. Give it a quick stir, and the lemon balm tea is done!


Serve it in a frosty glass with a spring of fresh mint or dehydrated lemon ring, and you'll have a perfect treat to beat the summer heat!

Until we meet again, may you be blessed!

Tuesday, October 24, 2017

Braised Finger Ribs

Oh my goodness, y'all! I just had to take a few minutes to share this recipe with y'all! I'm sorry for the lack of good photos, but I had no intentions of turning this into a post. After tasting the dish, though, I knew I had to blog it so I would remember how I did it! This dish is not hard, but it does take a long time. I suggest starting between two and three in the afternoon! Let's get started!

Ingredients
2 pkgs finger ribs
3-4 carrots, diced small
1 large onion, diced small
12 oz pkg bacon, diced (I use uncured.)
2 cups All Purpose flour
2_3 T cooking oil
1 cup red wine
3-4 cups beef broth
Two large sprigs of rosemary
Five or six small sprigs of thyme
Salt
Ground black pepper
Chili powder
Garlic powder

Directions
Sprinkle both sides of the ribs with all the spices. I'm sorry! I don't measure. For the biggest/meatiest ribs, I seasoned all sides. Then dredge the ribs in the flour. Set them aside.
Dice the onions, carrots, and bacon. I like to share with my friends on Facebook, so I do have a photo of those steps completed!


Now, toss the bacon into a heated cast iron Dutch oven and fry until crispy. Remove the bacon, but leave the grease in the pan. Set the bacon aside. Adjust the heat as necessary throughout the full recipe.

While the grease is still hot, brown the ribs. This should be really quick if your pan is still hot. It should take 45 seconds to a minute on both sides. I browned all sides of the  big ribs. I also did mine in two batches so the pan wouldn't be crowded. If the pan gets dry, add cooking oil to the bottom. As the ribs are done browning, move them to a plate and set them aside.

Turn the heat to medium and add the onions and carrots to the pan. Add a little broth to deglaze the pan. Add the wine. Scrape the bottom a bit as you move the carrots and onions around to be sure to get all the bits of goodness off the bottom of the pan! 

When the veggies just start to soften, turn the heat down and add two cups of broth.

Add the ribs back to the pan, standing the ribs on their side when possible. The ribs should only be sticking out of the broth just a little. Add more beef broth if needed. Add the bacon back to the pan with the ribs, tucking it between the ribby beauties! Ribby...I can make that a word, right?

Add the springs of rosemary and thyme. If you are picture crazy like I am, make sure to tuck the sprigs into the broth after taking the photo!


Doesn't that look so good already!? Turn the eye off. 

Place the lid on the pan, and place the pan in the preheated 350 degree oven for two hours. After two hours, turn the heat down to 325 and continue baking for another 30 minutes. Remove the pan from the oven, but leave the lid on for twenty minutes.

Just look at the glorious goodness awaiting your taste buds!! Be careful removing the ribs from the pan! The meat falls off the bone!


I am so sorry I don't have a better photo for you! I guess I will have to make it again just to get better pictures...and to feed it to my husband! He says he definitely wants to have it again! Okay, it's not even 8:30 in the morning, and I can hardly wait for lunch to have leftovers!!

Y'all go make this! I promise it's not hard, but your family and friends will think you are a master chef! I served it with roasted potatoes, and broccoli and cauliflower covered with a cheese sauce I made while I waited on the ribs to cook. Yum, yum!!


Until we meet again, may you be blessed!

Wednesday, July 12, 2017

Rosie's Cinnamon Candy Cucumbers

I get so excited when I find a food that is totally unexpected and excites me so much I can't wait to try it and make it myself! I especially love it when I can connect that recipe to a special memory or person. Such a recipe is what I want to share with you today!

A couple Saturdays ago, I was at church picking up my dishes from that evening's VBS fellowship when a friend was at the table nibbling something I had not seen on the table earlier but piqued my curiosity. Those pretty little red things caught my eye. They looked like red celery, had the crunch of water chestnuts, and had the lightly sweet flavor of a gentle cinnamon. I knew then and there I would would have to go on a embarrassingly relentless search for the person who brought the little jewels and figure out what they were and how they were made. As fate would have it, when I was ready to leave, I was blocked in and had to go back in to wait until I was able to leave. Would you believe when I went back in, I sat down right in front of the dear lady who had actually made my newly discovered gems?! I was so excited! Her name is Rosie, and I have come to know her as a sweet friend over the last few years. I enjoy her company so very much! I have enjoyed every minute I've ever spent in her presence. I have always left a visit with her happy and cheerful. She spent the next few days kindly and patiently answering my many questions.

Today, I present to you Cinnamon Candy Cucumbers! The following is the picture of the original recipe as Rosie sent it to me. I changed the name as a personal preference, added a couple details, and changed the processing time in my directions below, but the recipe ingredients and measurements are the same.


Cinnamon Candy Cucumbers 
Ingredients:
2 gallons of slicing cucumbers (about 10 lbs)
2 c pickling lime
2 gallons water
1 c vinegar
1 T alum
2 c vinegar
2 c water
10 c sugar
3 10oz bags red hot cinnamon candy

Directions:

Day one: Prepare 2 gallons of large cucumbers by peeling, seeding, and cutting into 1/4" slices. 


Soak overnight in a mixture of 2 c lime and 2 gallons of water. 


The lime will settle to the bottom and is normal. The recipe didn't say to, but I stirred mine around every so often. 


Day two:
Pour off lime water and wash.

You want to wash
Well to remove the
Lime.
Soak two hours in cold water. I added some ice since the water coming through my pipes doesn't get very cold without running a long time during the summer.


Drain that water again. Then mix 1 cup vinegar, 1 T alum and enough water to cover cucumbers. Soak two hours and drain.


Just before the two hour soak is over, mix and boil 2 cups vinegar, 2 cups water, 10 cups sugar, and 3 10oz. bags of candies.


Pour the hot liquid over the cucumbers. Not all my candies would completely dissolve. I finally gave up and poured them over the cucumbers. They eventually dissolved on their own.

It looks a lot different the next morning!


Day 3 and Day 4:
Place a large pan under a colander, and drain the cucumbers.


Bring the drained liquid to a boil, and pour the hot liquid back over the cucumbers. 

Day five:
Drain the cucumbers and reserve the liquid the same as above. Pack the cucumbers in pint jars leaving 1/4" headspace. 


Bring the reserved liquid to a boil and pour over the cucumbers leaving a 1/4" headspace.


Wipe the rims clean with a damp paper towel or cloth, and seal with a flat lid and ring. Process in a rolling water hot water bath for 10 minutes. Turn off the heat and let the jars sit in the water ten minutes before removing them from the water to avoid the liquid siphoning from the jars.


Until we meet again, may you be blessed!
*To ensure the safety of your food, follow the guidelines given by the USDA. I do not know if this recipe has not been tested or approved. 

Sunday, July 9, 2017

Peeling Tomatoes

Good day, reader friends!

I have several things to share here on the blog with you! The garden and canning are keeping me so busy, I just can't seem to find enough time to get posts written! That's a good problem to have, though! This is a short post I knew I could squeeze in before the children wake up.

Yesterday, I tried my hand at Black Bean and Corn Salsa! I cannot wait to share the recipe with you! As I was taking pictures to prepare for that post, I realized I was going to have to do something to shorten that post some. That's how the idea for today's post was birthed.

One of the key steps in making that salsa is to peel the tomatoes. I have several friends who were never taught their way around a kitchen and have been so busy living their life, they have not had the opportunity to teach themselves. They enjoy having basic tasks broken down into easy to understand steps. This post is for them and my reader friends who find themselves in the same boat. I know I am grateful for my friends, Barbara Ann and Lisa, who came and taught me when I made my first batch of salsa and spaghetti sauce!

The first step is to set a large pot of water to boil on the stove. The water only needs to be deep enough to submerge your tomatoes. Next, gather and wash your tomatoes.


Continue by cutting the core from the tomatoes with a small paring knife. I also like to lightly score an X through the skin on the bottom of the tomato with my knife. It seems to make the skin split more easily in the hot water.


When all the tomatoes have been cored, it's time to drop the tomatoes into your boiling water. It's important to wait until the water is at a rolling boil before dropping the tomatoes. I drop the tomatoes into the water three or four at a time. It's important to only do a few at a time to be able to pull them out of the hot water quickly. To remove them, I used a fine mesh strainer with a handle, but a slotted spoon can also be used.


Leave the tomatoes for 30-45 seconds or until the skin starts to split.


Immediately drop them into cold water to quickly cool them back down. Somehow I managed to not get a picture of them cooling in the sink. You can catch a glimpse of it in the picture above, but I'm sure you get the idea. It's just a little cold water in the sink with a little ice to make sure the water is nice and cold. Again, the water doesn't have to be deep, just deep enough to submerge the tomatoes. It doesn't take long for them to cool. I was pulling one batch out of the sink as I was putting one batch from the boiling water in. Once your red (or green) globes of yumminess have cooled, move them to a strainer to drain.

The green tomato is a ripe. It is a
Green variety from Baker Creek
Called Green Vernissage. They are
So yummy!

Here you can see how the skins are already pulling away from the tomatoes. That is exactly what you want to see. Now all that is left to do is gently slip and peel the skins from the tomatoes.


There you have it, my friends! Nice and easy and quick! Before I leave you, I would like to add one last tip. Make sure your tomatoes are nice and ripe. It makes this process much easier. I have done it with tomatoes that weren't as ripe, and it didn't work as well.

Until we meet again, may you be blessed!💕